 (2 votes, average: 5.00 out of 5)
In this post, we’ll show you how you can install Apple iWork (and Apple Keynote) on your Mac. Remember, as of now, iWork comprises Keynote, Pages, and Numbers. You can also get a trial version of iWork before deciding to buy a retail version.
To install iWork, follow these steps:
- Insert the iWork CD/DVD in your optical drive (and if you have downloaded the trial version, just double-click the downloaded file).
- Either way, you’ll see the iWork installation screen that looks like what you can see in Figure 1, below.

Figure 1: iWork Install Screen- Now double-click the Install iWork option, and you’ll see a screen that says that iWork wants to determine if it can be installed, as shown in Figure 2, below. As you must have realized by now, you hardly have any choice but to click the Continue button. Do that!

Figure 2: iWork License Screen- Click the Continue button in the next screen as well, and you will see the Read Me screen. Read if you want, or just press Continue to view the License screen, shown in Figure 3, below. Next, you click the Continue button to get this moving. Click the Agree button in the pop-up screen that comes up.

Figure 3: Another iWork License Screen- Select the Destination drive to install iWork. If you have just one drive, that decision is already made for you. Then click Continue. Now, click the Install button in the next screen! And if that wasn’t enough, enter your computer password in the pop-up window that comes up, and click the OK button.
- Now, if all goes well, the Installer will work for a while. After a while, you will see a screen that says everything went well, and iWork was successfully installed on your Mac, as shown in Figure 4, below.

Figure 4: iWork Successful Installation- Click the Close button and you are done with the installation.
Related Posts
 Apple announced the release of iWork '09, including Keynote '09, the presentation component of the iWork suite. iWork '09 also includes Pages '09 and ...
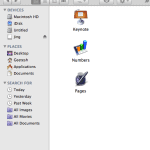 By default, the iWork installation creates shortcuts for all the programs within the iWork suite such as Keynote, Pages, and Numbers within the Mac OS...
 We remember the first version of Keynote had a nice manual. Also, the second one, which came as part of iWork 05, had a substantial paper manual in th...
 We already showed you the Slide Navigator and Outline views in Apple Keynote in an earlier post. Keynote provides two more views that we will explore ...