 (1 votes, average: 5.00 out of 5)
You already learned how you can join SlideBoom and upload your presentations as part of this SlideBoom series. In this post, we’ll go beyond the basics and show you how you can share your uploaded presentations with others:
- First, make sure that you sign into your SlideBoom account.
- Click the My Account button to load up your account page. On this page, you can see all your presentations, as shown in Figure 1, below.

Figure 1: Your account page at SlideBoom- Click on the presentation that you want to share. Doing so opens the presentation page URL on SlideBoom, as you can see in Figure 2, below.

Figure 2: Your presentation page at SlideBoom- Note the area towards the right side of the presentation window—a zoomed-in view, as shown in Figure 3, below.

Figure 3: Share options at SlideBoom- All the options shown in Figure 3 are explained below:
- The Post option at the bottom has icons that can be clicked on. Doing so allows you to post uploaded presentations to community sites like MySpace, Facebook, Hi5, etc.
- The Bookmark option lets you create a public or private bookmark at one of the many bookmarking sites, such as del.icio.us, Digg, Technorati, etc.
- The Presentation URL option lets you copy the actual SlideBoom URL of the presentation.
- The Embed into WordPress option provides code that lets you add SlideBoom presentations to your WordPress blog.
- For other blogs or any website, you can use the Embed in your blog code—copy the code and paste it to embed.
- Finally, the Share by email option opens the Share by Email sheet, as shown in Figure 4, below. Add an email address, your name, and a message. Then, click the Send button.

Figure 4: Share by Email
Next, we’ll show you how you can make changes to your SlideBoom profile.
Related Posts
 SlideBoom, an online presentation viewing and sharing site, announced the availability of Pro accounts that add more options than what are available t...
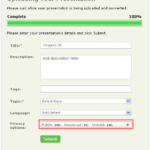 You already learned how you can upload your presentations to SlideBoom—but do you know that, unless you enable the option, all downloads of the origin...
 In the last post in the SlideBoom series, we provided a brief introduction to this slide-sharing site. In today's post, you'll learn how you can becom...
 SlideBoom is a website where you can upload your PowerPoint presentations. At the back-end, a PowerPoint to Flash converting engines makes Flash movie...