![]()
This is the print version of this page. All content is copyright Indezine.com 2000-2026.
![]()
Thoughts and impressions of happenings in the world of PowerPoint and presentations, continuously updated since 2003.
See Also:
PowerPoint and Presenting Notes
PowerPoint and Presenting Glossary
Most applications underline everything you select — the process is simple: you select a word, a sentence, or even an entire paragraph — and then press a keyboard shortcut or choose an option so that all the selected text is underlined. PowerPoint behaves the same way — but there’s a difference — not in the resultant text, but in how the text appears. Let us not forget that PowerPoint is a large format — more akin to a billboard than a business card — and text is often projected at large sizes.

Learn how you can selectively remove underlines from descender characters.
Filed Under:
PowerPoint All Versions
Tagged as: Design, PowerPoint, Text, Tutorials
Comments Off on Stop Underlining Your Descenders!
Making gridlines visible on your slides in PowerPoint 2013 is only a good idea if you use the Grid feature to attain some results. If you are serious about using Grids to position slide objects with more precision, you must first visit the options available for changing Grid settings. Once you have played around with the grid settings, you are better equipped and prepared to explore how the Snap to Grid feature can help you accurately position and move slide objects such as pictures, shapes, or anything else you can select and move on a slide!

Learn how the Snap to Grid option works in PowerPoint 2013 for Windows.
Filed Under:
PowerPoint 2013
Tagged as: PowerPoint 2013, Tutorials
Comments Off on Learn PowerPoint 2013 for Windows: Working with Snap to Grid
Once you insert a movie clip on your slide in PowerPoint 2011, you may find out that the clip is too dark or light in terms of appearance. This is similar to what you may see on your television, especially a new television where you have to make a few adjustments to get the picture just right. Similar corrections can be made in any of the movie clips you insert within your PowerPoint slides. It’s very important to understand that such adjustments may not only be necessary for the appearance of the movie clips on your computer, but also for how they show when projected onto a screen or even on a connected TV. Projectors are typically not as bright as computer screens, and some adjustments may help.

Learn about the Correction Adjustment options for videos (movies) in PowerPoint 2011 for Mac.
Filed Under:
PowerPoint 2011
Tagged as: Movies, Office for Mac, PowerPoint 2011, Tutorials, Video
Comments Off on Learn PowerPoint 2011 for Mac: Video (Movie) Correction Adjustments
Pushpins can be used to pin a picture, or a note, or a letter to a surface, a notice-board, or a wall. Using our ready-made pushpin graphics, you can create a similar look on your slides that makes a picture, shape, or anything else appear as if it has been pinned! Here’s another set of pushpin graphics that look like real pushpins on your slides! These ready-made pushpin graphics are contained within the presentation you will download. You’ll see them in five colors. Just copy them and paste them on the edges of pictures in your presentation.
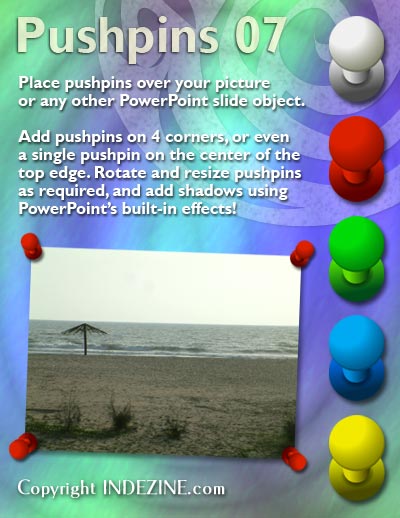
Download and use these pushpins in your slides.
Filed Under:
Presentation Bank
Tagged as: Design, Graphics, PowerPoint, Presentation Samples
Comments Off on Handmade Slides: Pushpins for PowerPoint – 07
Once you make Gridlines visible on your slide in PowerPoint 2013, you may wonder if there’s really any benefit using the Gridlines other than the obvious benefit of possessing a visual grid that lets you place slide objects. The answer is both Yes and No — Yes because that’s all you may believe happens on the surface — and No because you should know about how the Snap to Grid option works — this option is not active by default! The Snap to Grid option helps to get the proper position of the slide objects. Other than making this option active, you can change the grid settings — such as changing the spacing in between the gridlines.

Learn how the gridlines snap and help you position slide objects in PowerPoint 2013 for Windows.
Filed Under:
PowerPoint 2013
Tagged as: PowerPoint 2013, Tutorials
Comments Off on Learn PowerPoint 2013 for Windows: Snap to Grid Settings
Microsoft and the Office logo are trademarks or registered trademarks of Microsoft Corporation in the United States and/or other countries.