![]()
This is the print version of this page. All content is copyright Indezine.com 2000-2026.
![]()
Thoughts and impressions of happenings in the world of PowerPoint and presentations, continuously updated since 2003.
See Also:
PowerPoint and Presenting Notes
PowerPoint and Presenting Glossary
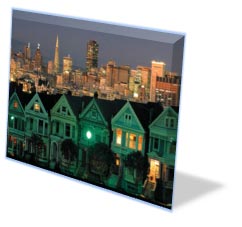
PowerPoint enables users to edit inserted pictures using the adjust picture options, and provides them with some preset Picture Styles which can be directly applied to the selected pictures. Also, they can add beautiful borders to the pictures. But, this is not the end — they can also apply individual effects to the inserted picture like, a shadow, glow, bevel, 3-D rotation etc.
Learn about Effect options for pictures in PowerPoint 2011 for Mac.
Filed Under:
PowerPoint 2011
Tagged as: Office for Mac, Pictures, PowerPoint 2011, Tutorials
Comments Off on Learn PowerPoint 2011 for Mac: Picture Effects
Have you seen a running stitch effect around an object — especially an embroidered one? It’s possible to create all sorts of such fancy effects, right inside PowerPoint — without using any other program. In this tutorial, you will learn how to create this effect step-by-step — and this should work in almost any version of PowerPoint released in the last 10 years.

Explore creating a dashed line border around a shape to create almost an embroidered edge effect.
Filed Under:
PowerPoint All Versions
Tagged as: Fills, Lines, Outline, PowerPoint, Tutorials
Comments Off on Create Dashed Line Borders in PowerPoint
The main advantage of the Advanced Timeline is to edit the timing and sequencing of your animations. You can easily control the start time, duration, and end time of your animation to the most minute level. In addition, you can also animate any slide object very slowly to span over a whole minute or more by just dragging the start and end points of any animation bar outwards in the timeline. We have already explored how to show/hide the Advanced Timeline within PowerPoint 2010, and in this tutorial, you will learn how to control animations with the help of Advanced Timeline.

Filed Under:
PowerPoint 2010
Tagged as: Animation, PowerPoint 2010, Tutorials
Comments Off on Learn PowerPoint 2010: Control Animation Timings with Advanced Timeline
A few days ago, our PowerPoint and Presenting Stuff LinkedIn group had a great discussion on Pecha Kucha. It started with one of our members asking for some guidance on how to go about preparing for a Pecha Kucha presentation. To those of you who do not know what Pecha Kucha is, it is a presentation format that originated in Japan in the year 2003. In Japanese, Pecha Kucha translates to chit-chat or chatter. On this page, we will explore the ten best Pecha Kucha tips.
Each Pecha Kucha speaker presents with a deck of 20 slides (or images). Each of these slides progresses automatically to the next one, after being visible onscreen for 20 seconds. This is the reason why Pecha Kucha is often known as 20×20.
That’s a total time of fewer than 7 minutes and explains why most Pecha Kucha slides are more visual than text-laden. Text-heavy slides would take much more time to explain than the allocated 20 seconds, and will also get the audience reading the text rather than giving their undivided attention to the Pecha Kucha presenter.
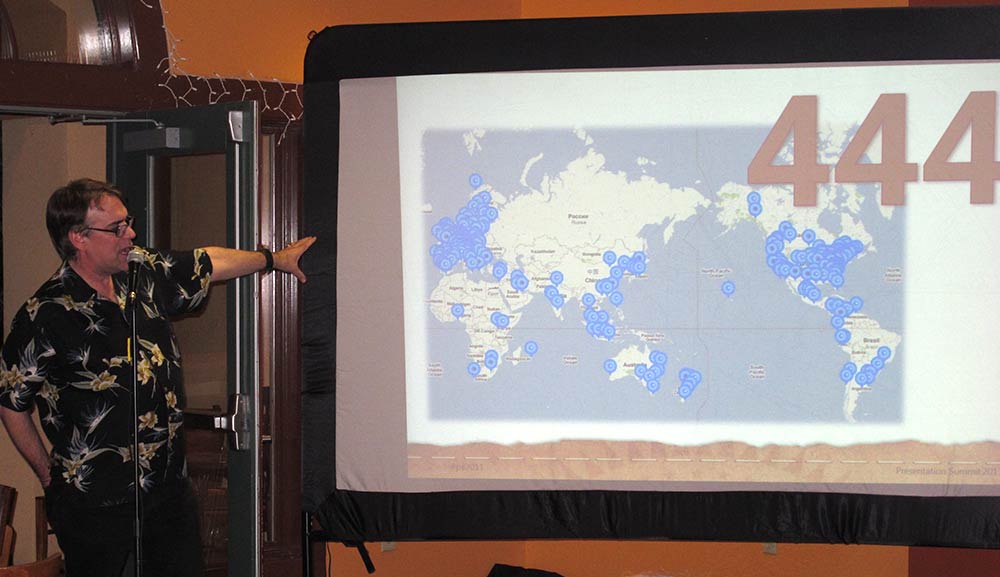
Picture courtesy: Ric Bretschneider
Filed Under:
Thoughts
Tagged as: Charles Greene III, Delivery, Pecha Kucha, Pecha Kucha Tips, PowerPoint, Presentation Skills, Ric Bretschneider
Although it is so easy to insert a picture in your PowerPoint slide, you should almost always look at doing more with your pictures thereafter. Probably the first thing you can do to make the picture more effective is cropping. In addition, you can also adjust how the picture looks by applying adjust picture options. Thereafter, you may apply any of the preset Picture Styles available. However, PowerPoint packs quite a punch as far as picture edits are concerned — you can even play with the borders that surround your pictures. In this tutorial, we will explore the Border options that allow you to add anything from a simple outline to a beautiful frame to make your pictures stand apart.

Learn how to add and edit Picture Borders in PowerPoint 2011 for Mac.
Filed Under:
PowerPoint 2011
Tagged as: Office for Mac, Pictures, PowerPoint 2011, Tutorials
Comments Off on Learn PowerPoint 2011 for Mac: Picture Borders
Microsoft and the Office logo are trademarks or registered trademarks of Microsoft Corporation in the United States and/or other countries.